Archived fabrication article. Follow current resin, catalyst, ventilation, PPE, and composite-dust safety guidance.
Procedure
DIY Carbon Fibre- overlay an Audi C4 Climate Control Surround Instructions –D. Forgie Mar. 18/08
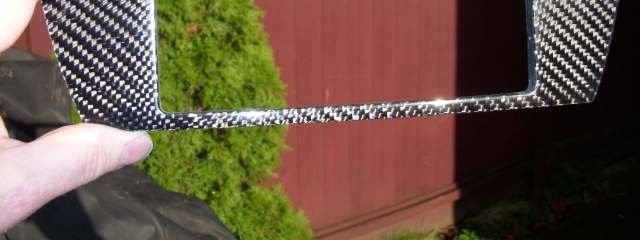
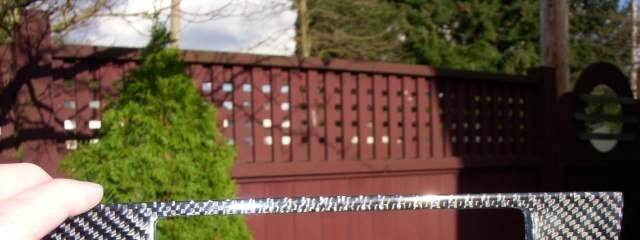
The intent of this DIY is to give you enough hints so you can produce this:
From this:
To this you will need the following supplies:
• A C4 Audi automatic Climate Control (CC) surround, either wood (elm or walnut) or black plastic, e.g. 93 S4. • Carbon fibre (CF) cloth approximately 8” x 14” (you need to use a piece larger than the surround by about 1.5” all ways) • Sandpaper 80 to 120 grit to roughen the surface of the surround
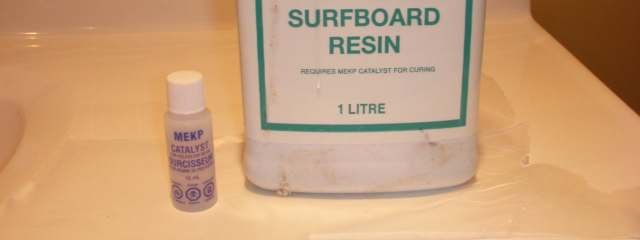
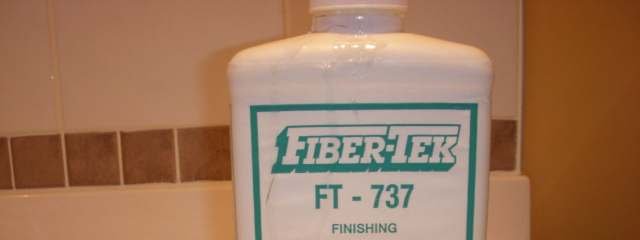
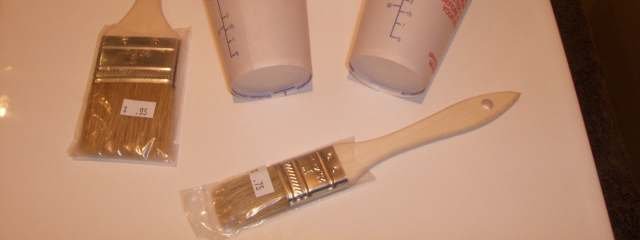
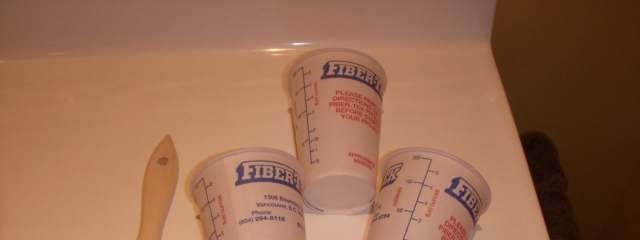
• Isopropyl alcohol and/or solvent to clean the surround of any waxes or silicone or “ArmourAll”, etc. • Fibreglas resin that is intended to be non-yellow, e.g. Fiber-Tek Surfboard Resin (500 mL or 1 L) • Sufficient appropriate catalyst (to be added to resin at 10 to 15 drops per ounce) • 3 Mixing cups (I got wax paper cups with measuring volume marks from the resin supplier for free) • Wooden stir sticks • 3, 2” wide hog-hair (cheap) “paint” brushes (these will be consumed/wasted, one per coat) • Masking tape, e.g. ¼”, ½”, 2” • A cardboard softdrink or beer “tray” with a 2” lip (the thing 4 six packs comes on) • Wax paper • Disposable gloves, e.g. blue nitrile • Disposable particulate mask (under $1 at an Autobody supply store or NAPA, etc. don’t use a cheap one) • Wet and dry sandpaper, 400, 600, 1000, 1200 and 2000 grit (2500 too if you can find it) • Cutting tools, e.g. Dremel with grit disks or Xacto™ modeling saw • 8 inch single bastard metal (and plastic and wood) file – e.g. from Home Depot, Rona, Lowes, etc. • Small non-tapered, straight, round file • Polish suitable for clearcoats • Car Wax • Black Felt pen
Step 1: Prep the surround
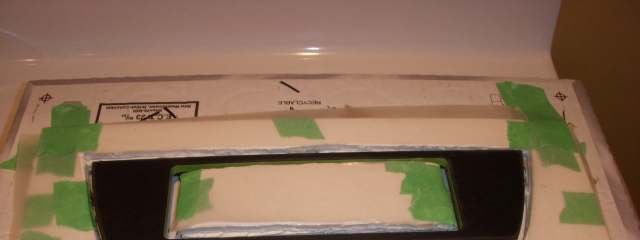
• You want the surface of the surround to be clean and a little rough. So wipe the surround with solvent and alcohol, each twice. • Sand the surround surface with 80 or 120 grit sand paper to roughen it up to provide something for the resin to bite onto. • Wipe the surround with an alcohol soaked clean rag (or paper towel) one more time. • Blow any residuals off the surround • Tape the outer and inter edges of the surround, as shown in the photo. Keep the tape back from the outer surface of the surround by about 1 mm or 1/16”. (The purpose of the tape comes later when you are cutting the resin-soaked (and cured) CF away from the surround)
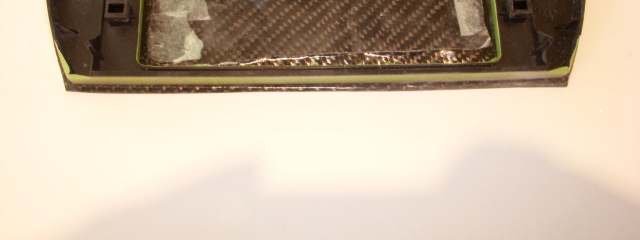
Photo of the prepped surround with tape on the edges:
Step 2: Prep the Carbon fibre cloth
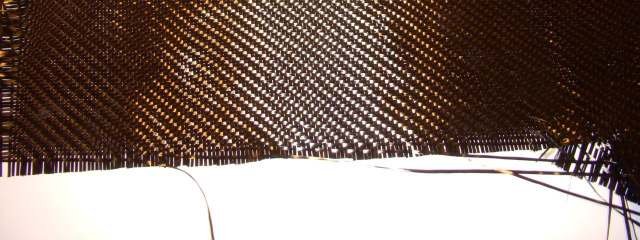
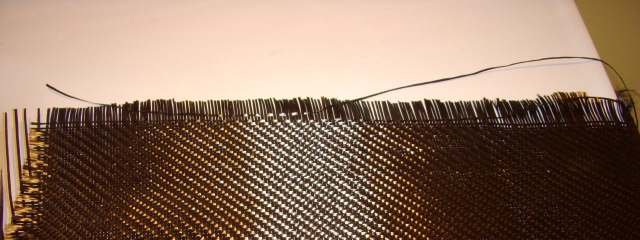
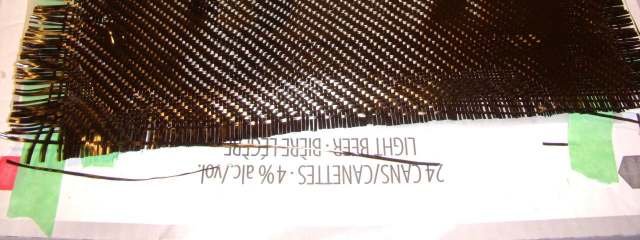
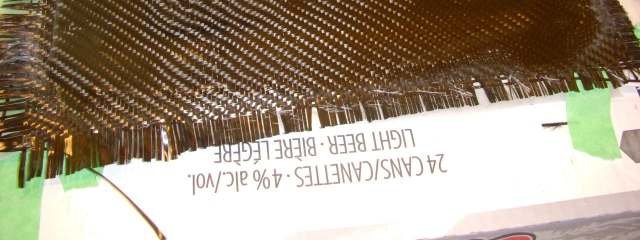
• Select a piece of carbon fibre that has no flaws and will be about 1 to 1.5” wider and longer than the surround on both ends and top and bottom edges (i.e. 2” to 3” wider and longer than the surround itself). • Consider how you want the “grain” to run, i.e. the diagonal running down left to right or up left to right. (See photo below) • Compare the size of the cloth to the surround and cut the cloth with long sharp scissors according (leaving the extra width and length). • Place the CF piece in a safe location
Step 3: Prep the lay-up base
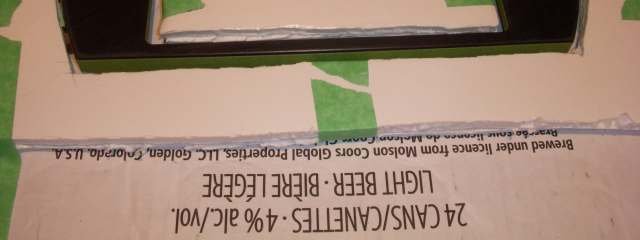
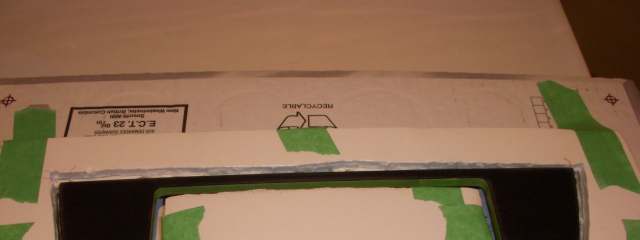
Since this is a non-vacuum bag method, you will want to lay the carbon fibre cloth on the surround without sags or bumps. As a result, you need to cut cardboard or foam poster board lay-base for the outside and inside of the surround. You want the end thickness of the lay-up base to be about 1 mm lower that the surround itself when the surround is pushed into the up turned drink can cardboard tray. You also want about 2 to 3 mm clearance between the surround and the inner and outer lay-up base. To do this:
• Cut the inner and outer lay-up surrounds from cardboard/foam board using markings from the surround as a template and a sharp knife.
• Cover the surfaces of the lay-up surrounds will contact the carbon fibre and resin with wax paper cut to shape and taped to the lay-up surrounds. Make sure the wax paper lays flat and tight to the lay-up surrounds and does not bulge.
Step 4: Prep the lay-up surrounds.
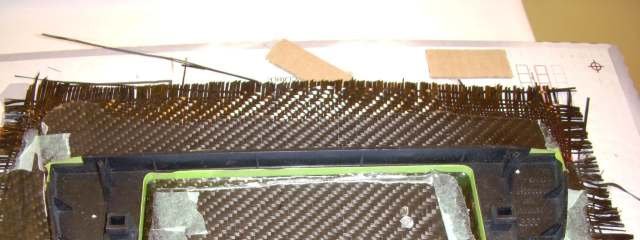
• Cover the up-turned cardboard drink “tray” with wax paper • Roughly center the plastic or “wood” CC surround on the tray and press the four “legs” of the surround into cardboard until the rest of the CC surround is tight to the cardboard tray. • Place the outer lay-up surround around the CC surround (wax paper up) and tape in position. Check that the height of the lay-up surround is just slightly below the upper surface of the CC surround. • Place the inner lay-up surround into the space in the middle of the CC surround (wax paper up) • Place the entire assembly on a flat work surface (if you haven’t already)
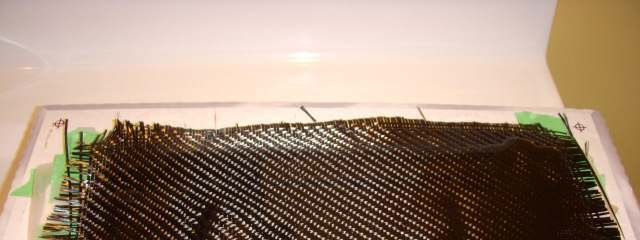
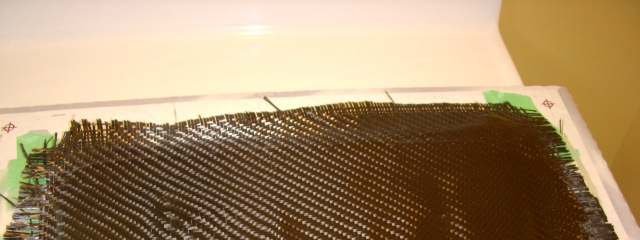
Note: in the following photo, I hadn’t got the wax paper on the center lay-up surround tight enough to the cardboard. This caused a bulge that didn’t lay down completely when the cloth was first applied. In the end, it wasn’t an issue but to avoid the angst, get the wax paper tight on the cardboard.
Step 5: Prep and apply the first resin coat
• Put on your disposable gloves and open the resin container • Pour 2 ounces of resin into a wax paper measuring cup. Close container. • Add the prescribed amount of catalyst, e.g. 10 to 15 drops per ounce or 20 to 30 drops total. Close container. • Mix the catalyst into the resin with the wooden stir sticks. Mix thoroughly but avoid mixing too fast and getting air bubbles in the resin. Mix for about 2 minutes • Brush the surface of the CC surround with a dry resin-free hog bristle brush to remove any dust, etc. • Dip the brush into the resin in the wax paper measuring cup and thoroughly coat the surface of the CC surround. You want the surface to look wet but not too wet. • Put the brush down on a safe surface, e.g. the wax paper on the cardboard tray. • Pick-up the pre-cut carbon fibre cloth piece and place it on the surround in the orientation that you decided earlier. Press the cloth gently down into the resin on the CC surround with your gloved finger tips or using the resin brush. Adjust the orientation of the cloth (straightening lines) as needed but try not to move it too much. • Thoroughly coat the top of the carbon fibre cloth using the brush dipped the resin. You want to go beyond the outer edge of the CC surround by about 1”. Cover the entire remainder of the cloth. Push the tip of the brush down into the cloth and the resin to make sure that the cloth is thoroughly contacting the CC surround • Lay on one last coat of resin across the cloth. Brush in one direction, e.g. left to right. • Put the brush and the remaining resin (probably about ½ ounce) aside on a safe surface (off the cardboard tray). (You might even want to place the resin cup, stir stick and brush outside in a safe place) • Pick up the cardboard tray with the surround assembly and place in an area that will have minimum dust and maximum ventilation, e.g. downstair bathroom (if your wife is out of the house). Turn on the fan (and keep it on for at least an hour while the volatiles flash off during the curing process). • Let cure in a safe place over night (You can probably speed curing up by placing the cardboard tray and surround assembly in a warm oven but that could lead to a divorce so I am not recommending that one).
Step 6: Prep and apply the second coat
• After letting the surround assembly cure for at least 12 hours, inspect it. There may be holes where the resin dripped thru the cloth in the gaps between the CC surround and the lay-up surround. No biggy. You’ll get them with this coat. • Put on your particulate mask and disposable gloves • Lightly sand the surface of the resin with 400 or 600 grit wet and dry sandpaper. If you use water, then you will need to wait for the carbon fibre in the holes to dry. The object is to smooth out little bumps and provide a bite for the second coat. • Wipe the sanded surface with an alcohol soaked cloth (paper towel), let dry and blow off residue. • Pour 1.5 ounces of resin into a new wax paper measuring cup (don’t try to reuse the first cup, there will be flakes of curred resin that will cause you grief). Close container. • Add the appropriate number of catalyst drops, e.g. 10 to 15/ounce or 15 to 22 drops. Close container. • Mix thoroughly but not too vigorously with a new wooden stir stick • With a new hogs hair brush, dry brush the surface of the carbon fibre to remove any dust or debris, etc. • Dip the brush in the resin and coat the carbon fibre as before. Start with making sure any holes are “fed” with resin and then layout a couple of nice wet coats, brushing in one direction. • Check for air bubbles and/or debris (brush hair) in the resin, remove with the brush as needed, ending with a one direction brushing. • Put the brush and resin down (you might have something less than ½ ounce left) • Set aside in that dust-free, highly ventilated area again. Turn on the ventilation fan and keep it on for at least an hour. • Let the coat cure overnight (again).
Step 7 Prep for the third and final coat
• Pull the surround assembly away from the cardboard tray • Remove the outer and inner lay-up surrounds (they might be a little stuck but the wax paper should allow them to be pulled away fairly easily). Avoid pulling the carbon fibre away from the CC surround
• Put on your disposable particulate mask and disposable gloves • Turn over the CC surround with carbon fibre attached and cut the excess resin-infused carbon fibre away from the assembly. Use a Dremel with a grit cutting disk or an Xacto modeling saw. Leave about 1/8” from the masking tape around the outside. Don’t remove the inner carbon fibre section yet.
• Turn the assembly back over and sand the surface of the resin with 400 or 600 grit wet/dry sand paper. Since you shouldn’t have any holes by now, sanding wet is fine. Dry off the surface with paper towel. • Wipe the sanded surface with alcohol and blow off any residue.
• Put the CC surround (and carbon fibre) back into the holes in the cardboard “tray” • Pour 1 ounce of resin into a new wax paper measuring cup. Close container. • Add the appropriate amount of resin, e.g. 10 to 15 drops. Close container. • Mix thoroughly but not too vigorously with a new wooden stir stick. • With a new hogs hair brush, dust off the surface of the surround carbon fibre. • Dip the brush into the resin and lay out a nice even, wet coat, brushing in one direction. • Check for air bubbles, and make a final wet brushing (after dipping the brush in the measuring cup again) • Check the surface against the light. It should be completely flat and wet. • Put the brush and resin down • Place the cardboard tray and CC surround in your dust-free well ventilated curing area and turn on the fan for at least 1 hour. • Leave to cure overnight
Step 8 Rough Trimming
• Inspect your work. The surface should be smooth and the carbon fibre should appear “deep” in the resin. So far so good. • Cover the top surface of the resin with 2” masking tape to protect it from scratches in the next steps. • Turn the CC surround over. • Trim out the center section of carbon fibre. This can be tricky because its hard to get down into the CC surround. For the first surround trial (on a walnut surround), I used a rotary saw blade (looks like a drill bit but cuts on the side like a saw) in a Dremel but these are very difficult control. One the second trial, I used the rotary saw in the Dremel to cut towards the corners (staying 1/8” away) and then turned the assembly over and completed the cuts between the holes using the Dremel and grit cutting discs (also requires some skill and patience to avoid “oopses”). Go slowly and it will soon be done.
• Once you have the centre section out, the rest is just slow labour – using the single bastard file on the straight and gently curved sections slowly file away the carbon fibre-resin mixture, towards and just too the masking tape. Always file into the surround from the front (good) side in case you chip the resin, the chip will be to the inside and you are removing that. If you are very brave and very good, you can use a ceramic tile grinding/cutting bit in a Dremel (variable speed please) to speed the initial part of the rough trimming stage but it is dangerous in the sense if you screw up, you might not be able to fix it and will have to start over (or give up). I used the ceramic tile bit on my first trial and made a small screw up (I didn’t use the masking tape guide “trick”) and couldn’t tell where the carbon fibre ended and the surround started. I was able to fix that “oops” with a little bit of resin-catalyst mixture but this type of fix should be avoided. • Once you are down to the masking tape on all edges, then you can remove the masking tape and either continue to use the flat and round files or use 120 grit sandpaper to remove the last carbon fibre-resin mixture down to the original CC surround profle. I placed a sheet of sand paper on a very flat and hard surface (my table saw table) and then stroked the outer edges of the CC surround on the sandpaper. Feel the edge often so not to take surround, only carbon fibre and resin. • For the inside portion, I used the flat file by “waving” it across the flat surfaces and then the small round file in the corners. Again, go slow and check that you are just down to the original CC surround profile and not into the CC surround.
Step 9 Final Finishing
Now the fun part when you finally get to create the final product!!
• Sand the top surface of the surround with 400 grit wet and dry, with water. Sand the inner and outer edges of the surround gently as well. • Then move up to 600, 1000, 1200 and 2000 grit in succession. Sand with water, rinse and check often. Try to stay flat, don’t gouge. Check for sanding scratches. If there are, retreat a grade and sand the scratches out (gently) and then move up the grit ladder again to end with the 2000 (or 2500 if you have it). • Now you get to polish. Use something that cuts a bit but not too much, something that is safe for clear coats should be good. The longer you polish the better the finish will be (to a point).
• When you are happy with the polishing (the surface should be very smooth and uniformly reflective), then you can wax the surface and buff up the shine. If you aren’t happy, go back to the 2000 grit wet and dry, wet sand, re-polish and re-wax until you are. • Use a black felt pen on the edges of the carbon fibre and original surround to hide any edge blemishes. Wipe off any felt pen marks on the polished face of your new beautiful carbon fiber surround.
Step 10 Install the surround
Step 11 Admire your work
Step 12 Crack open a beer. Sip (or guzzle if that suits you)
Step 13 Belch. Loudly.
Step 14 Smile.
Dave Forgie, March 18, 2008
Additional Photos



Related Tech Tips
Revision History
- — Updated
