
Archived procedure using a period substitute damper. Verify present-day part availability, dimensional compatibility, and steering safety before installation.
Parts / Part Numbers
431 425 021
305 425 021 2
Procedure
Audi UrS Steering Damper R&R
The Audi UrS cars (1992 – 1997) have a hydraulic steering damper fitted, ostensibly to assist in controlling tramlining and steering wander with the wider tires fitted to these cars. This “how-to” describes the replacement of the Audi damper (p/n 431 425 021) with the much less expensive VW Fox part (p/n 305 425 021 2), which was a direct bolt-in on my 1994 S4. Hmm, note the similarity in the part numbers. Must be a co-incidence :o)
The fixed end of the damper is bolted to the body near the junction of the right fender and the firewall. The movable end is bolted to the tie rod bracket on the steering rack.
Remove and replace the damper as follows:
1. The damper can be replaced with the car on the ground. Turn the steering wheel to full right lock. Remove the black plastic cover protecting the ignition POS connectors on the firewall.
2. Remove the bolt securing the fixed end of the damper to the body (see Photo 1). This is a 17 mm hex head bolt engaged in a captive nut on the body. There is a spacer between the damper bushing and the body – don’t lose it!
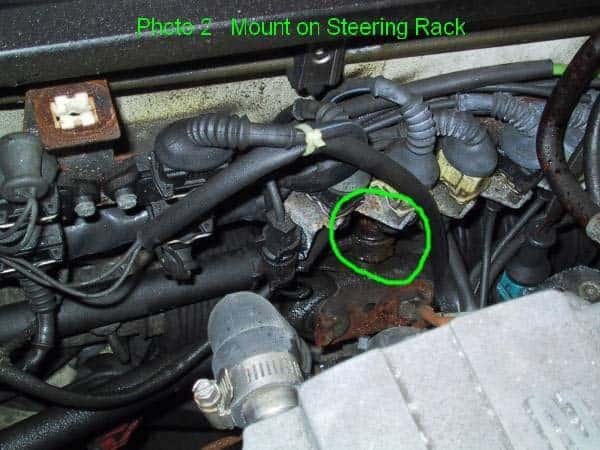
3. Remove the nut from the top of the bolt on the movable end (see Photo 2). The nut is a 15 mm hex and the bolt head is 17 mm.
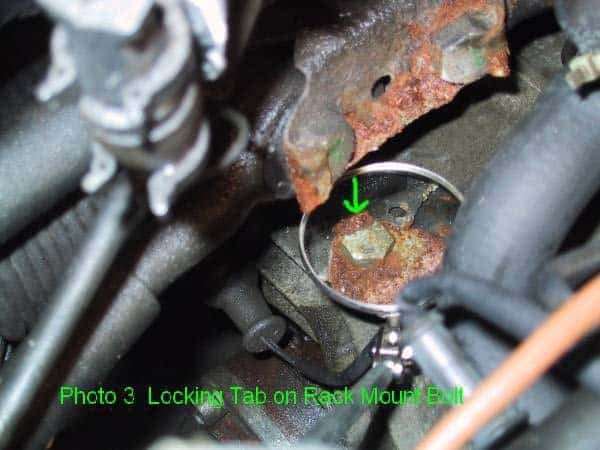
4. Note that the bolt comes up from the bottom of the bracket. It is secured by a metal tab bent over the bolt head (visible in the mirror in Photo 3). NOTE: THIS IS CRITICAL!!! If the bolt is not secured by the tab and the nut comes off, the bolt will drop down and jam on the transmission, locking the steering. THIS COULD RUIN YOUR ENTIRE DAY!
5. At this point, you will try to lift the movable end off the bolt. Alas, it can’t be done – the bolt is just a bit too long to allow the damper bush to clear the firewall. You have to drop the bolt. Go ahead, I know you don’t believe me, so crank the steering back and forth looking for the magic spot that will let you get the damper off. Just don’t jam the free end of the damper into something expensive. Uh huh. See – told ya!
6. The true believers will have moved on to this item immediately – the rest of you, welcome back! Using your handy-dandy mechanics mirror and a long screwdriver, bend the metal tab back to free the bolt. This will have been made a bit easier for you lazy sods that didn’t put a wrench on the bolt head and tried to crank off the nut while relying on the tab to hold the bolt head – spinning the head under the tab will loosen it up a bit if it doesn’t break the rusty sucker off.
7. Drop the bolt (not on the ground!) and remove the damper. There is also a spacer under the damper bushing on this end – don’t lose this either.
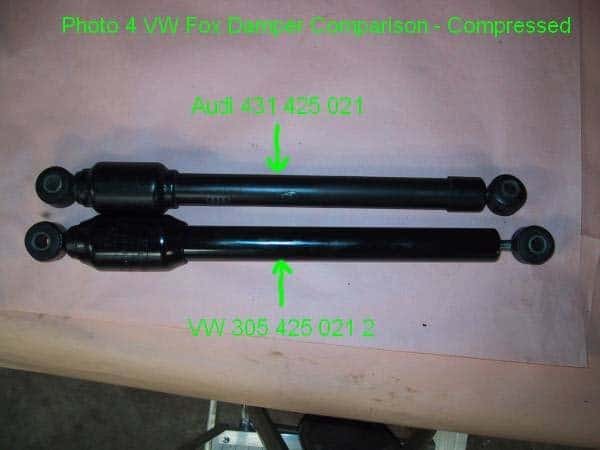
8. Photo 4 shows a side-by-side comparison of the Audi damper and the VW Fox damper with both compressed (OK,OK, the VW damper isn’t fully compressed – it has a gas charge and I was too lazy to tie it closed). The Audi damper is 13.125 inches eye to eye. The VW damper is 13.625 inches eye to eye (yes, it was fully
compressed when I measured it!). Fortunately, this did fit my car with no problem. Note the larger oil reservoir on the VW unit.
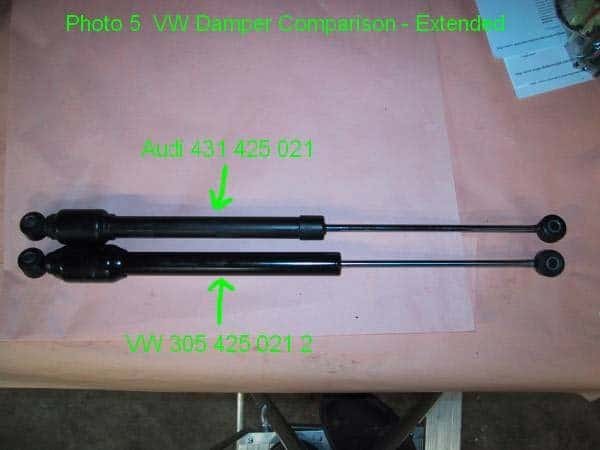
9. Photo 5 shows a side-by-side comparison of the Audi and VW dampers fully extended. They both have the same eye-to-eye dimensions in this position.
10. Install the moveable end of the damper on the rack bracket. Be sure to insert the spacer under the damper bushing. I put Loctite blue on the bolt for a little extra security.
11. Install the fixed end of the damper, ensuring the spacer is inserted under the damper bushing. Tighten the bolt to 30 ft.lb.
12. Back to the moveable end. Make sure the flat of the bolt head us parallel with the edge of the tab (see Photo 3). Tighten the nut on the moveable end bolt to 30 ft.lb. Using your mirror and a hammer, BEND THE METAL TAB BACK OVER THE BOLT HEAD. DO NOT SKIP THIS STEP!!!
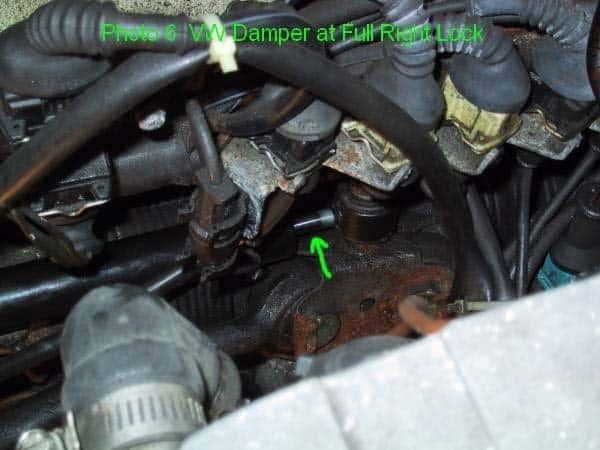
13. Ensure your car is turned to full right lock. Check to make sure the damper is not bottomed out – you should be able to see some polished shaft (see Photo 6).
14. Enjoy!
Fred Munro
May 27, 2003
Additional Photos
Related Tech Tips
Revision History
- — Updated
