Fuel-system work involves fire and environmental hazards. Inspect current line condition and use modern fuel-rated replacement materials and safe working practices.
Procedure
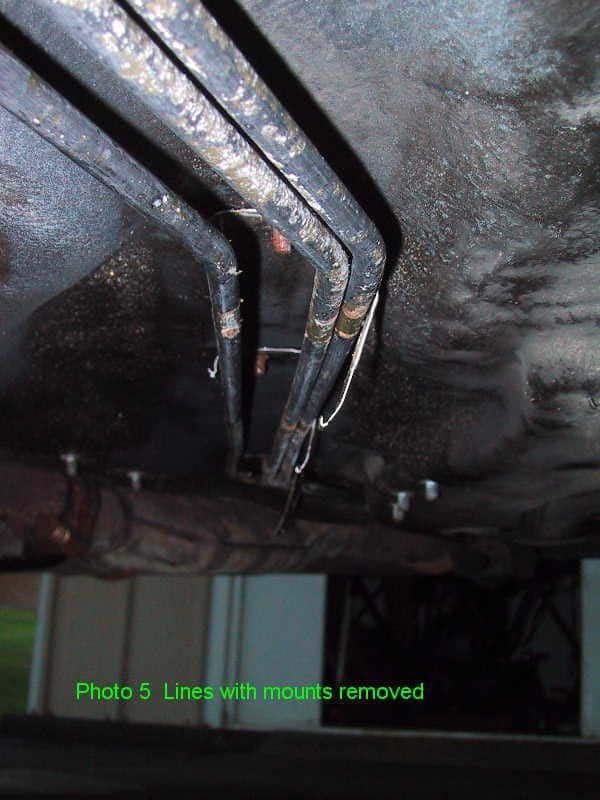
The three under body fuel lines on the UrS cars run along the right side of the car and are held to the body by rubber mounts secured by stainless steel clips. The outer line is high-pressure fuel to the rail, the centre line is vapour, and the inner line is fuel return to the tank. Although the steel lines are well protected with a layer of copper plating covered by galvanizing covered by a green paint, the rubber mounts create a problem in rust belt cars. Salt from winter roads creeps under the rubber and is held against the fuel line, corroding the lines. These lines are now failing on the UrS4 cars and unless the mounts are removed and the lines cleaned and painted, a fuel leak is guaranteed somewhere down the road.
I just did this repair on my ’94 S4 and have detailed the process below. Unfortunately this story has an unhappy ending – the return line began leaking one month after the repair, so I replaced all three lines. I should have done this maintenance two years ago.
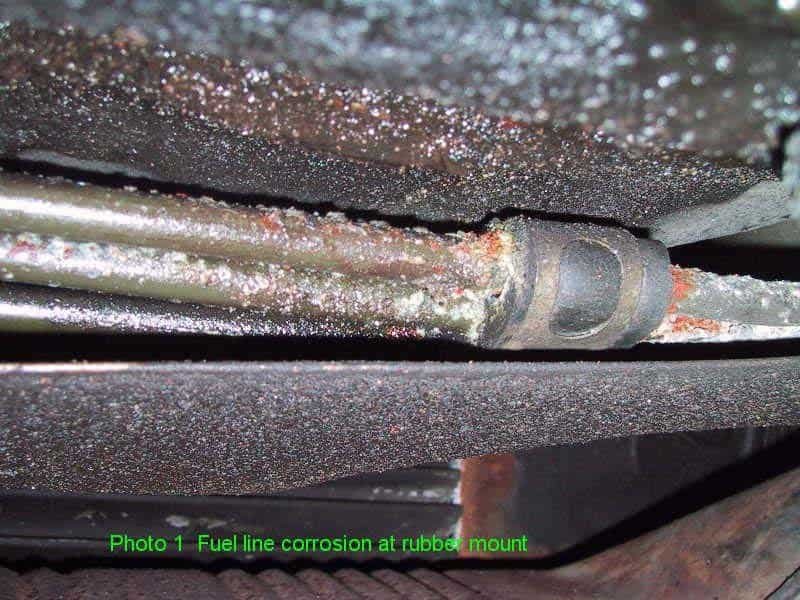
1. Photo 1 shows what a corroding line looks like. This was the most corroded area on my car and the spot the line eventually failed.
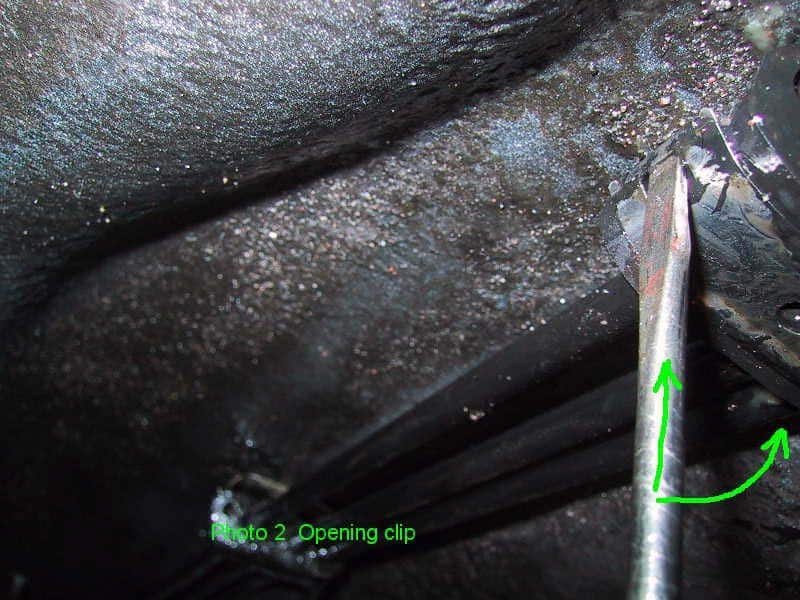
2. Remove the cross member (10 x 13mm nuts) to improve access to the lines. Photo 2 shows how to open the mount clip. Fit the tip of a small screwdriver under the lip of the clip and push up and out to lift the lip off the hooks.
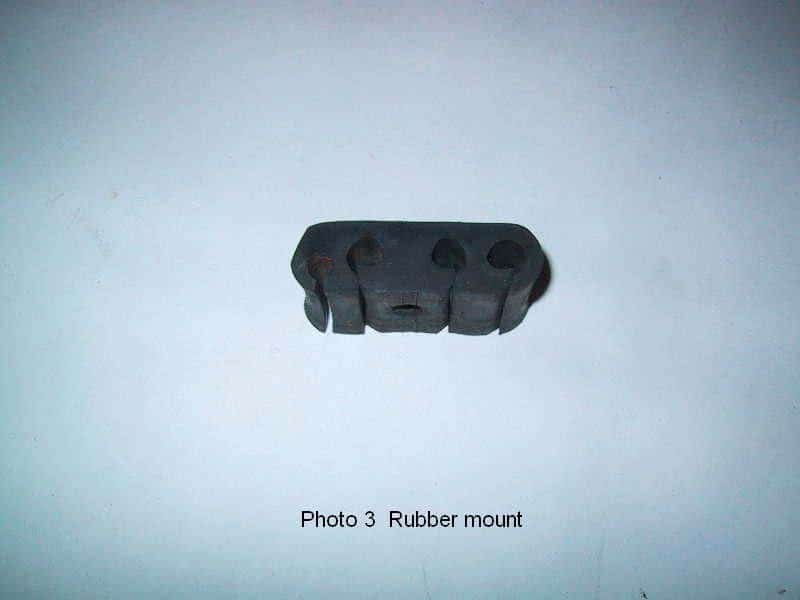
3. The rubber mounts are split at the top (see Photo 3). Remove them from the line.
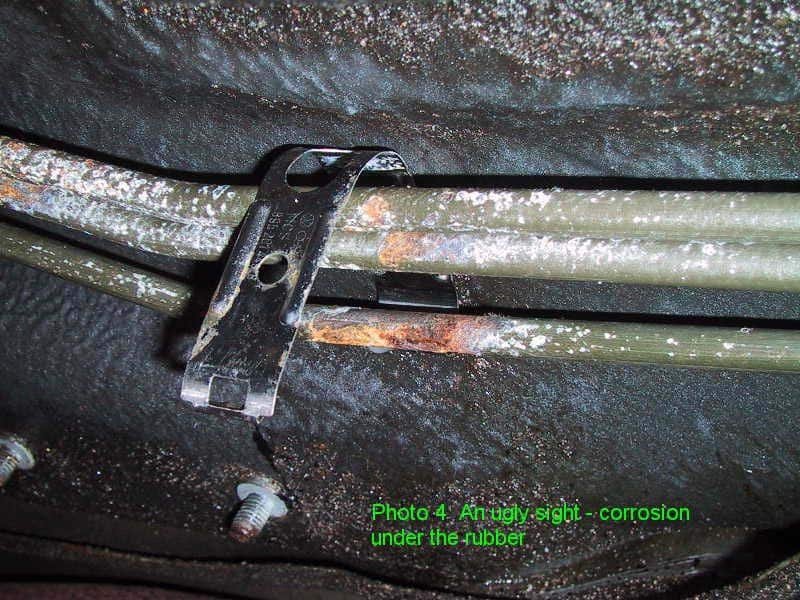
4. Photo 4 shows the corrosion that was occurring under the rubber – the worst spot in this photo was the area of failure in the return line.
5. Photo 5 shows the lines with all mounts removed except the ones at each end. These were left on to hold the lines in position while the centre length of the line was cleaned and painted. Note the corrosion under all the rubber mount areas. The front clip and mount cannot be removed without removing the driveshaft shield. This involves removing the exhaust straight pipes from the cats to the centre muffler.
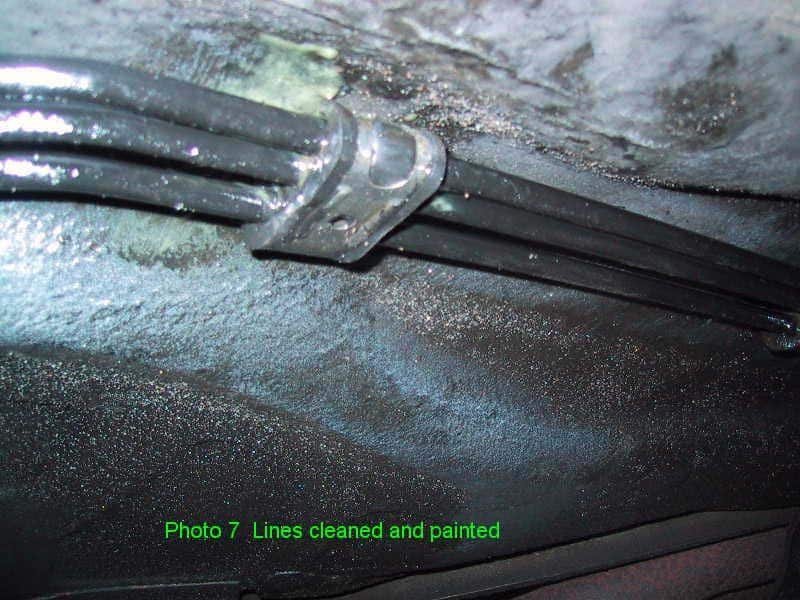
6. Clean up the lines with steel wool (or reasonable facsimile) and wash with a good water-rinse degreaser (I used Simple Green). 7. I painted the lines with two coats of POR-15 over the residual rust that was left after I cleaned the lines up.
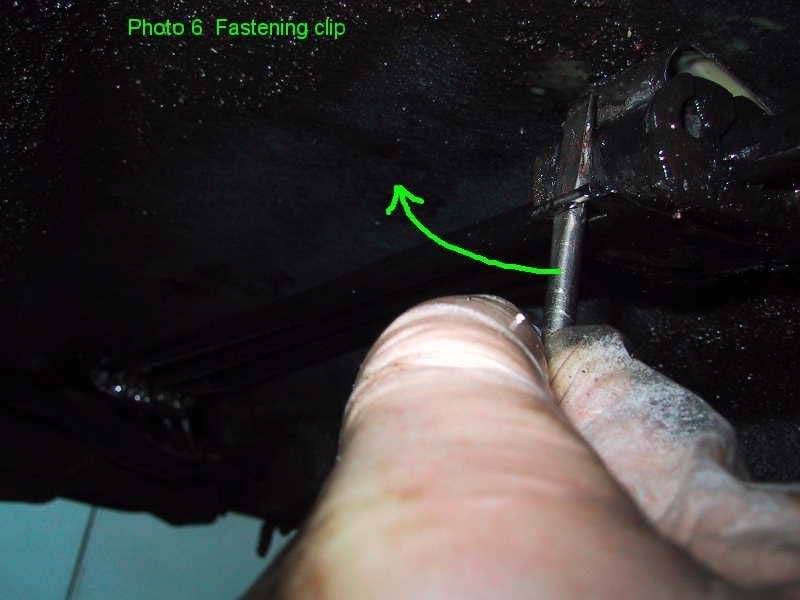
8. Spray the lines under the mounts with an anti-corrosion spray (I used FluidFilm) and install the rubber mounts. 9. Fasten the stainless clips by sliding a small screwdriver through the opening in the lower half of the clip and engaging the tip of the screwdriver on the hook on the upper part of the clip (see Photo 6). Prying up on the screwdriver compresses the mount and the lower half of the clip slides up and engages the hook.
10. Photo 7 shows a section of the repaired line. Looks a lot better than Photo 1, doesn’t it? Too bad I didn’t do it sooner!
Fred Munro ’94 S4 Oct. 20, 2003
Additional Photos
Related Tech Tips
Revision History
- — Updated
