
Archived procedure. Verify current timing-belt service parts, torque specifications, and service intervals against current technical references before use.
Procedure
Audi AAN Timing Belt R&R – 1994 S4
I've just finished the t-belt R&R on my '94 S4 and thought I'd put together a "how-to" while the agony is still fresh in my mind. I took some photos during the process and added them in. Note that the photos are not necessarily in sequence – some I took as I was putting it back together. I was fighting with my wife for possession of the digital camera the entire weekend! The entire job took me about 15 hours (at my slow and methodical pace). To do it again might take 6 hours or so. On this job you'll want to replace: t-belt serpentine belt thermostat water pump t-belt tensioner roller crank seal
Believe me, you don't want to have to do it again if the water pump fails in 20k, not to mention the $$$$ if the water pump or tensioner seizes, tears off the t-belt, and the valves kiss the pistons.
First, consult the Bentley for verification of the steps below – my memory is good, but the eidetic feature started to fade a bit several years ago.
1. Remove the belly pan. 2. Remove the bumper grill strips – centre one first, end ones after. Remove the temp sensor behind the license plate holder and unclip the wire. 3. Remove the front bumper – 5 Phillips head screws securing each wheel well flap to the wheel well liner and two hex-head bumper bolts. Unclip the bumper ends by pushing down and pulling out on the top and then unclipping the bottom. If you pull straight out you'll be there for a long time (there's 30 minutes gone). Pull the ends down to clear the wheel well and pull the bumper straight off from the front. 4. Remove the right side upper bumper trim and the front upper bumper trim.(10 mm socket, Phillips screwdriver). 5. Remove the Bowden cable (hood latch release) from the lock carrier. Undo the clamp (7 mm socket) and slide the cable out of the clips. The clips have very large locking tabs that will snap off if you try to pry the clips loose. 6. Remove the lock carrier – 8 body colour bolts, 2 upper rad mount bolts, 4 upper headlight mount screws.(10 mm socket, Phillips screwdriver)[Photo 1] 7. Remove the right lower headlight trim strip. Unclip the headlight washer cover, remove the Phillips screw at the end of the trim strip, pull the headlight washer forward, and remove the strip. 8. Remove the cold air intake and the small plastic piece that holds the trim strip screw. (Phillips screwdriver)[Photo 1} 9. Unbolt the right lower rad mount (bottom nut). Loosen the left lower rad mount. (13 mm socket) 10. The right side on the rad can be swung forward about 10" to give you access to the t-belt paraphernalia. Fab up a bracket to hold it in this position ( or buy the Audi tool :o) Bolt the bracket to the right bumper mount. (13 mm socket)[Photo 2]
11.Remove the viscous fan. You can do the Bentley thing and remove the entire fan assembly. I just unbolted the fan from the viscous clutch & had lots of access (10 mm socket)[Photo 3]. Make sure you mark the position of the fan before taking it off – don't want any balance problems, do we?
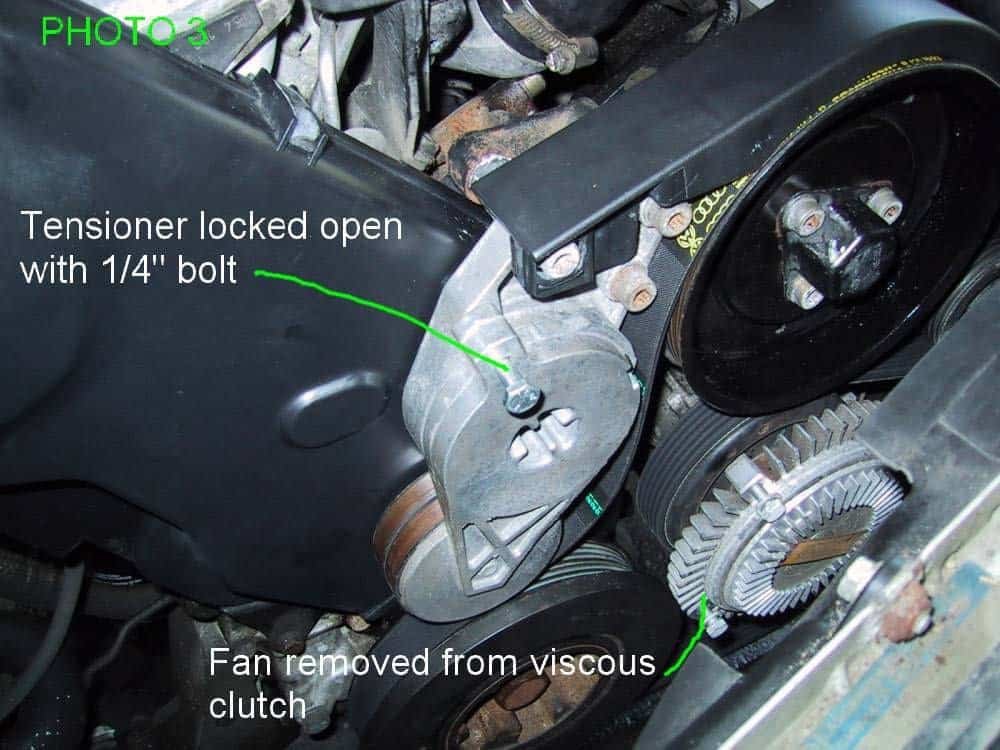
12. Take the tension off the serp belt tensioner (17 mm open end wrench) and lock it open by sliding a 1/4" bolt through the holes (Audi makes a tool for the purists)[Photo 3]. Remove the bolt at the left end of the hydraulic pump belt guard (5 mm Allen). Remove the 3 bolts securing the tensioner (6 mm Allen) and remove the tensioner assembly and belt guard (as one unit). Remove the hydraulic pump drive pulley. NOTE! This pulley can be installed both ways. The front is stamped “This side front”. If you install it backwards, it will be ¼” out of line. The belt will go on, but will jump the pulley and split in two a few miles down the road. You’ll hear the thump when it fails. 13. Unclip and remove the upper t-belt cover. Gaze in horror at the condition of the old belt. 14. Rotate the engine to TDC. The mark on the cam pulley should line up with the arrow cast into the cam cover [Photo 4], the notch in the crank pulley should line up with the dimple on the lower t-belt cover [Photo 5], and a "0" or notch cut into the flywheel should line up in the window on the left side of the tranny. Alas, on my car I could not find a flywheel mark in spite of an hour of searching [Photo 6]. Fine, we'll do without it.
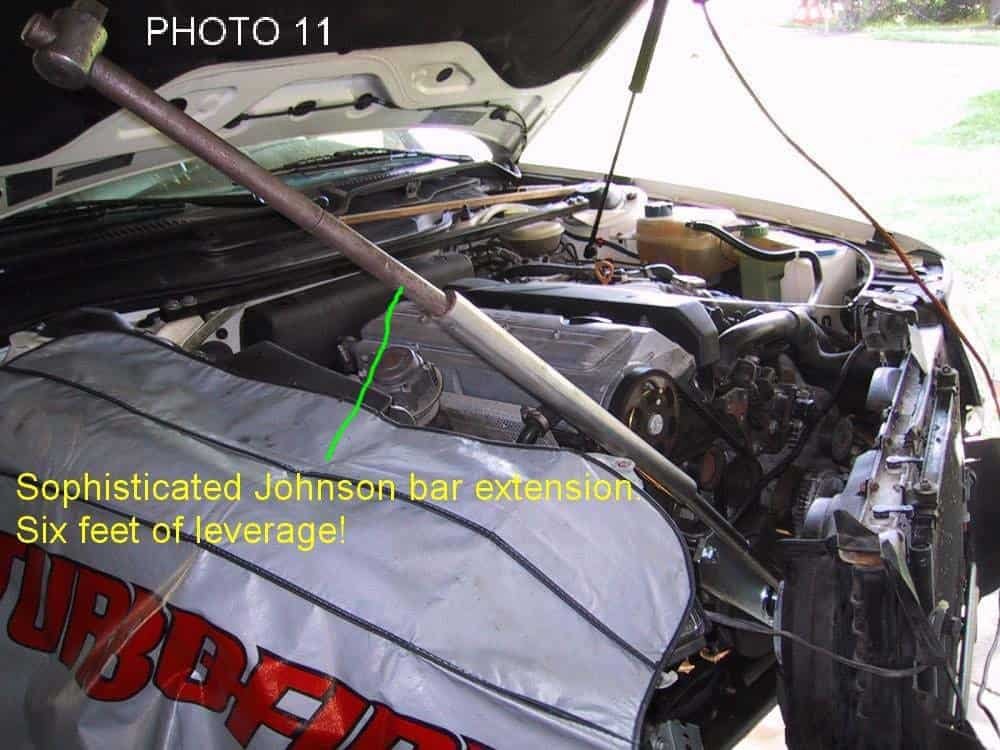
15. Now for the really, really fun part – the dreaded CRANK BOLT!!! Mount the engine-locking arm to the crank pulley and bolt to the block (17 mm socket)[Photo 10]. I had to rotate the engine 180 degrees off TDC to get the crank lock on. Remember which way you rotate it – you want to go back to TDC once the pulley is loose. I would not recommend doing this without the lock, but others have used pins through flywheel holes, ropes through spark plug holes, etc. Once you feel the torque required to loosen this thing, the lock is the only really secure way to go. 16. Use a 3/4" drive bar and 27 mm socket on the crank bolt. I had to use a 6 extension to get mine loose [Photo 11]. My upper back hurt for the rest of the day. Watch where you put your brace hand – not everything in the vicinity will take this kind of pressure. Just loosen the bolt off – leave it in and the pulley on. Remove the crank lock and rotate back to TDC. Check TDC. Double check TDC. If you get this wrong, your car won't start (if you're lucky, that is…). 17. Remove the coolant reservoir cap. Drain the coolant at the rad by opening the drain tap (large Phillister screwdriver) [Photo 7]. Use a suitable container. Clean up spills or you will poison numerous neighborhood animals. 18. Remove the upper rad hose and move it out of the way (Phillister screwdriver) 19. Remove the throttle body air intake hose from the throttle body and the ISV. Cover the open ends of the hose, TB, and ISV with plastic to keep out dirt, debris, mosquitoes, blackflies, and flying spittle. Move the hose out of the way.
20. Unbolt the hydraulic pump from the mount – two bolts in front, one hidden in the back. (13 mm socket). Move the pump out of the way.
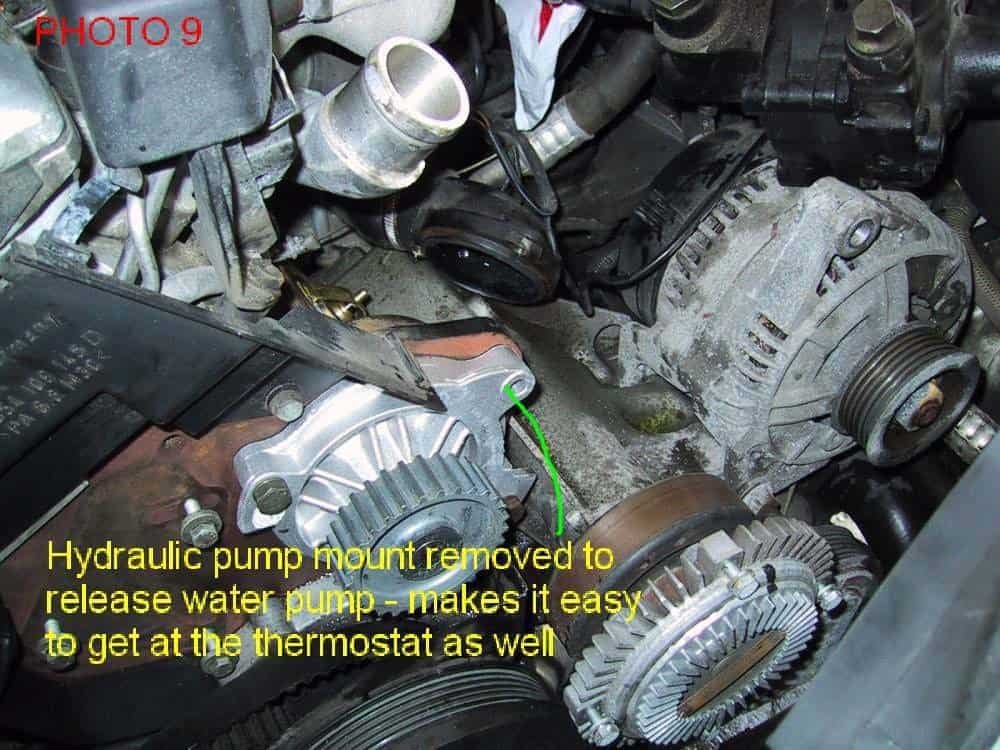
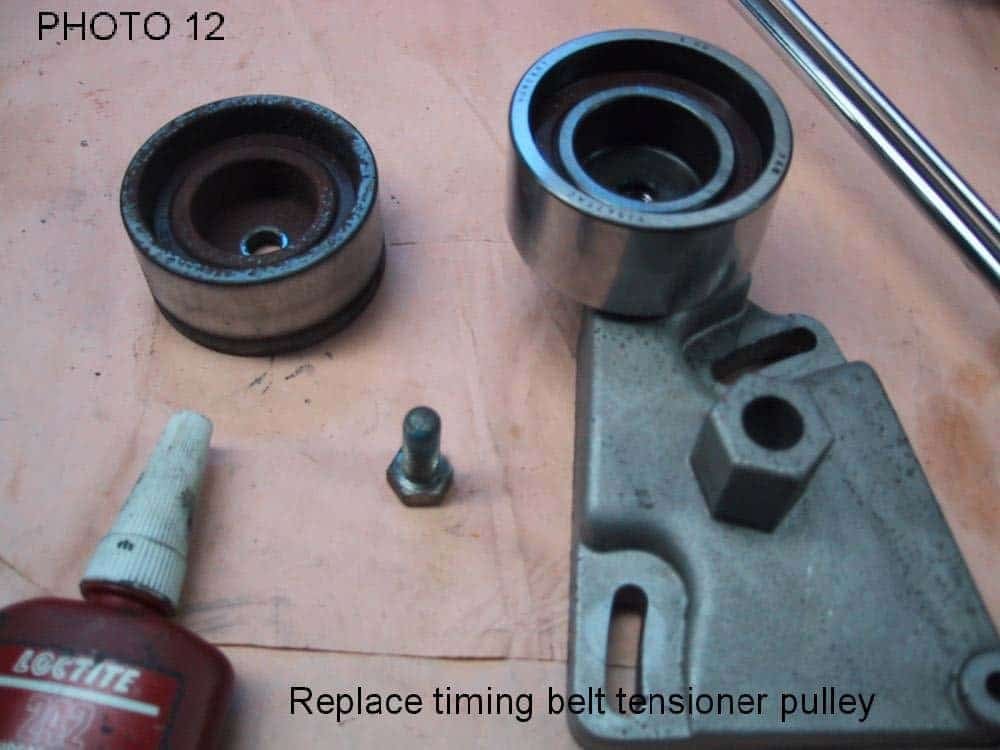
21. Unbolt the upper alternator mount (6 mm Allen, 13 mm socket). Loosen the lower alt mount bolt (15 mm socket). Swing the alt out of the way. 22. Remove the hydraulic pump mount. One bolt is also a water pump securing bolt and the mount overlays the water pump boss – the reason the mount has to come off. It also gives better access (6 mm Allen). [Photo 8 & Photo 9] 23. Unbolt the thermostat housing (10 mm socket). Pry it off – careful, it's plastic! Pry out the thermostat. Catch the coolant that sprays all over the engine – there's lots of it, you are draining the head and upper block. Clean up the mounting surfaces. 24. Remove the t-belt tensioner (10 mm socket). Pull the old belt off the cam pulley and the water pump. 25. Remove the old tensioner roller (13 mm socket) from the tensioner. The roller comes right off – it's not pressed on. Fit the new roller. Loctite on the bolt is a good idea here – you really don't want this one backing out! Torque is 15 ft-lb. [Photo 12] 26. Remove the old water pump (13 mm socket). Another flood of coolant – be prepared. Clean up the pump sealing surface on the block – there will be rust deposits and may be some pitting. If it is badly pitted, you may need your favorite goop to make sure the o-ring seals. 27. Install the new pump.
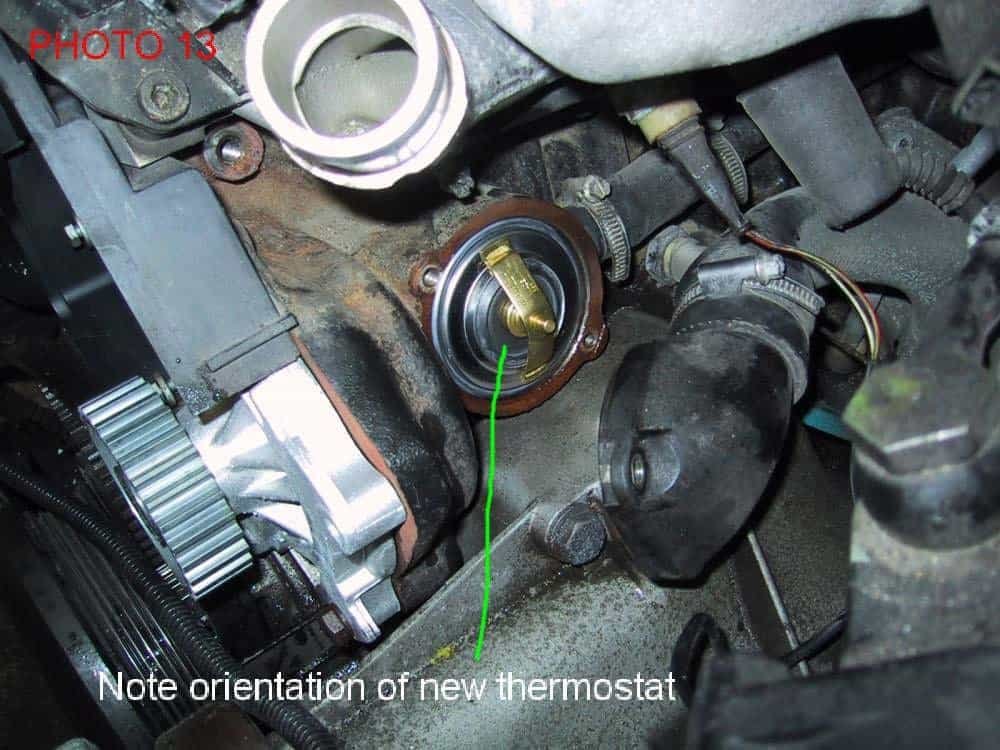
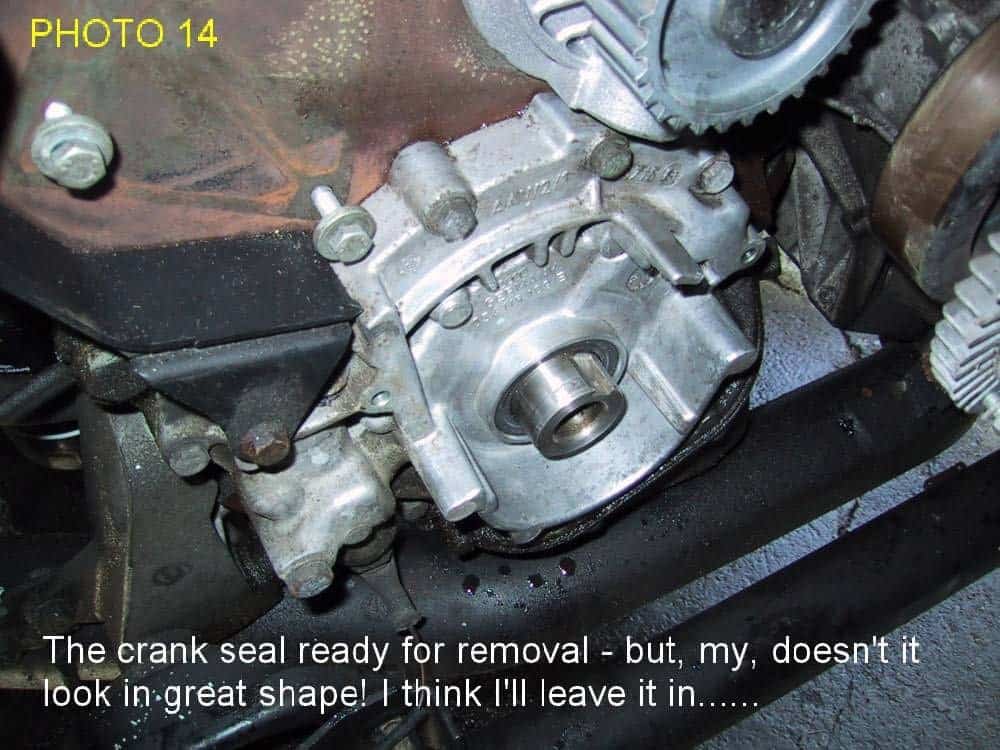
28. Install the new thermostat and o-ring. Note the orientation of the thermostat – the support bars are vertical. [Photo 13] Bolt on the thermostat housing – 7 ft-lb torque 29. Install the hydraulic pump mount bracket and the third water pump bolt. Torque the water pump bolts – 15 ft. lb. 30. Unbolt the lower t-belt guard (10 mm socket). Note the bolts are loctited at the factory. 31. Remove the crank bolt. MAKE SURE the engine is on TDC when you have the bolt out. Pull off the crank pulley, old belt, and lower guard together. 32. Now for the crank seal. Ah yes, the crank seal. It really SHOULD be done when you are this far. But….I didn't do it. The factory glues these in with some kind of sealant. It took me 4 hours to cut the crank seal out of my 200q with a needle file after I had mutilated it beyond all recognition using all manner of removal schemes that sprang from my fevered imagination. That seal was glued in. It wasn't leaking at 250k km. This seal wasn't leaking at 130k km. I left it in there until next time. Apparently the seal removal tool does not work on these seals (according to the local dealer's Audi tech). If you want to do the seal, and you really should, good luck. I chickened out. You can post me for the needle file technique if you are desperate.[Photo 14]
33. Now that we are safely past the seal, put the new t-belt on the crank pulley, and install the pulley, belt, and lower guard. Loctite the lower guard bolts. Now comes the crank bolt dilemma. The Bentley says use sealant paste on the bolt and threads. What the heck is "sealant paste"? Loctite? Never-seize? The crank bolt on the 200 had OEM Loctite on the bolt shoulder and nothing on the threads. The OEM S4 bolt had lube on the threads and nothing on the shoulder. The dealer tech puts Loctite on the threads – he says you really don't want that bolt to back off. After mulling it over, I put Loctite blue on the bolt shoulder and threads – it'll stay there until the next time I have to change the belt, and then, by George, I'll be cursing and using a 10 foot bar – and a new bolt. Snug up the bolt. 34. Install the belt on the water pump and cam pulley. Install the tensioner. Note that the Bentley says to torque the tensioner bolts to 15 ft-lb – NOT! These bolts are only 6 mm and I stretched one before the cheesy feel and belated common sense kicked in at 11 ft. lb. A 6 mm bolt commonly takes 7 ft. lb of torque. I replaced the bolt, put on Loctite, and tightened using my wrist-o-meter torque wrench. 35. Make sure the engine is at TDC and the cam pulley mark is aligned with the cam cover arrow. The belt should be tight from the cam pulley over the water pump to the crank pulley. Tension the belt a bit with the tensioner. Rotate the engine 180 degrees if required to install the crank lock. Note which way you rotate it so you can rotate it back. 36. Install the crank lock. Torque the crank bolt to 338 ft. lbs with a 3/4" drive torque wrench or 258 ft. lbs if you are using the Audi crank bolt tool. There is enough room to get a 3/4" torque wrench in there, so the Audi tool isn't required. I used a digital bathroom scale, a piece of plywood, a 3-foot bar, and my wife – but let's not go there. Renting a torque wrench would have been easier. It's a good thing my wife is exceptionally good-natured. 37. Rotate the engine back to TDC. Make sure ALL the marks line up. If they do, tension the belt until you can just twist the section between the cam pulley and the water pump pulley 90 degrees using your thumb and forefinger. Check the TDC marks again. If the marks don't line up, slack off the belt, line up the marks, and reposition the belt. NOTE: The above is the “safe" way to do this – only rolling over the engine with the cam connected. I actually had the belt off and rolled the engine 180 degrees to lock the crank and torque the bolt because I didn't want the belt tension on the pulley when I was torquing it down. Probably an inconsequential consideration. If you try this an forget what you are doing, you may kiss the pistons with the valves. 38. Ah, the worst is over. Re-assemble, as the Bentley says, in reverse order of removal. Some further notes: 39. Rotate the engine by hand several times to make sure the valves aren't hitting the pistons ( in other words, you haven't really screwed up the valve timing). 40. Use Audi recommended phosphate-free coolant. When filling coolant, I used a funnel to fill up the upper block and head through the top hose connection before installing the upper rad hose. I then filled up the expansion tank, ran the car until the thermostat opened, and topped up the expansion tank. Keep an eye on the level for a day or so – I needed a little more coolant after this morning's commute. 41. If you have bolts or pieces left over, figure out where they go and put them in – even if you have to take it all apart again to do it.
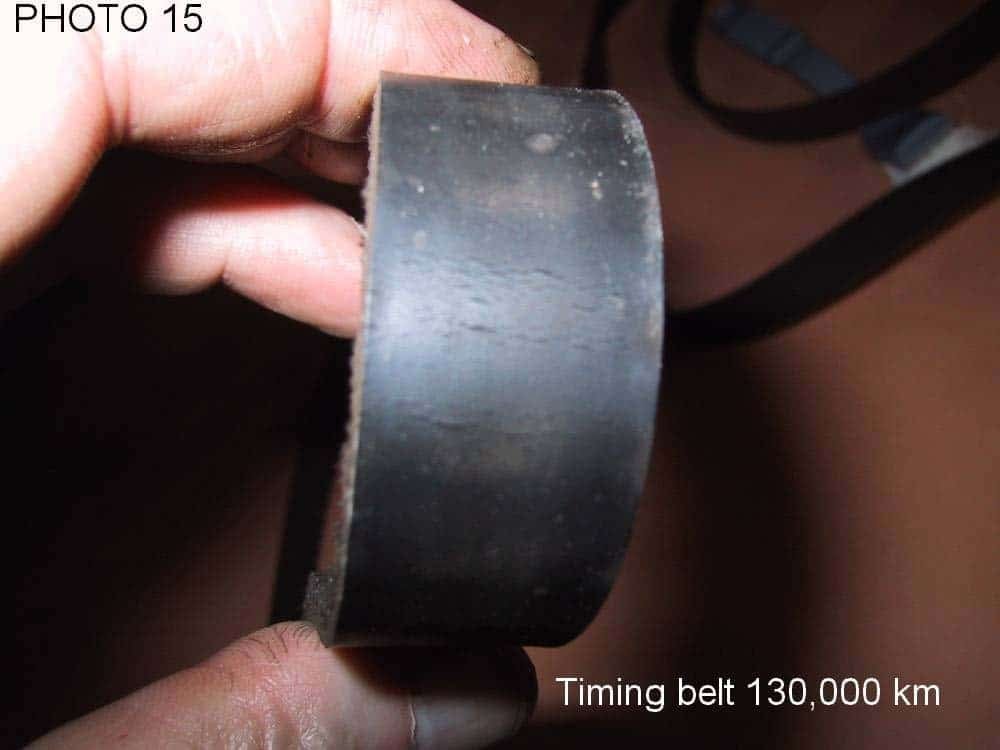
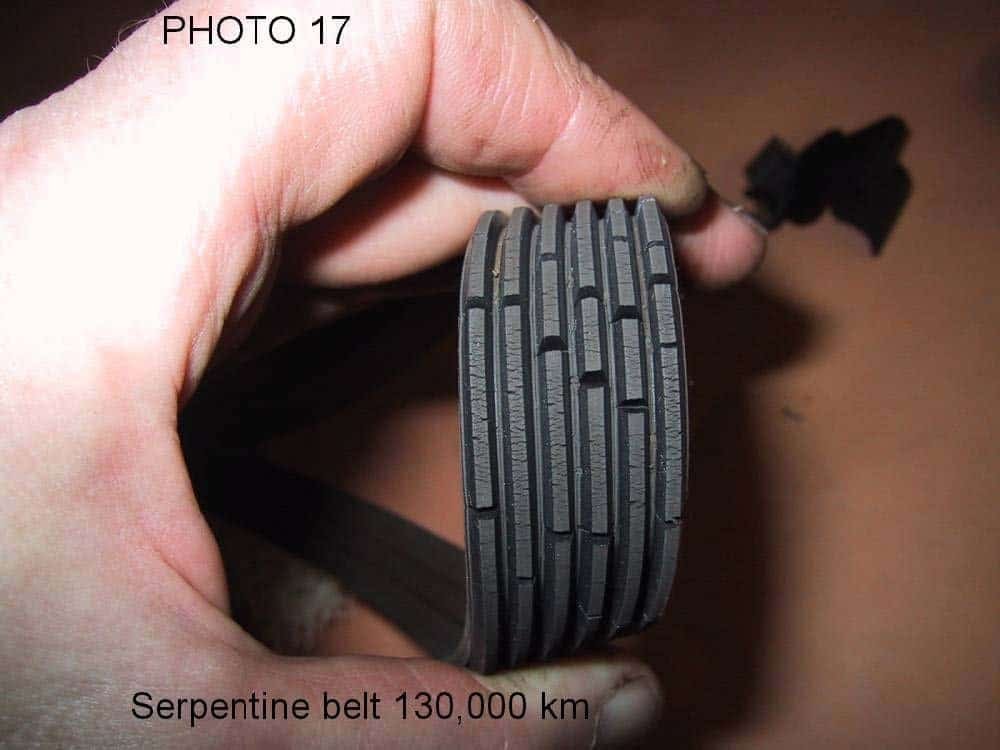
42. Have fun! What else would you rather be doing! If common sense argues against any of the above, go with common sense! 43. Images of the old belts can be seen in Photos 15 & 17
Fred Munro '94 S4
October 5, 2002
Additional Photos




Related Tech Tips
Revision History
- — Updated
